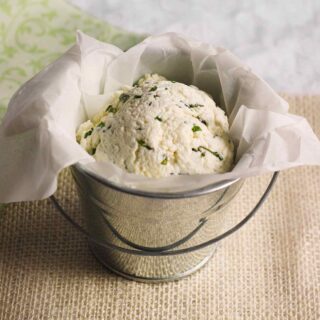
Rich and luscious, homemade ricotta is easy and amazing!

Let’s cut right to the chase: this is one of the easiest DIY food projects you’ll ever do, and the effort-to-reward ratio is super high. I just wanted to get that out there, in case the word “homemade” made you want to run screaming for the Back button.
I don’t know what it is about dairy, but it’s been a sort of hobby of mine to try DIYing the homemade goodies that can come from a simple glass of milk. Butter, compound butter, buttermilk, ice cream.
The homemade butter — my first attempt, years and years ago, was amazing. So fresh and sweet, it reeled me in. Homemade ice cream — swoon.
But I think homemade ricotta tops them all. I didn’t particularly care for ricotta — buried in lasagne, okay; spread on a cracker, no. freakin’. way — until I first tried someone else’s homemade ricotta. It was a revelation — there’s just no comparison. It’s almost two different foods altogether, store-bought vs. homemade.
And, like I said first thing: it’s so easy.

Here are the steps:
Pour.
Heat.
Squeeze.
Stir.
Drain.
Wait.
Gottit? Good. 🙂
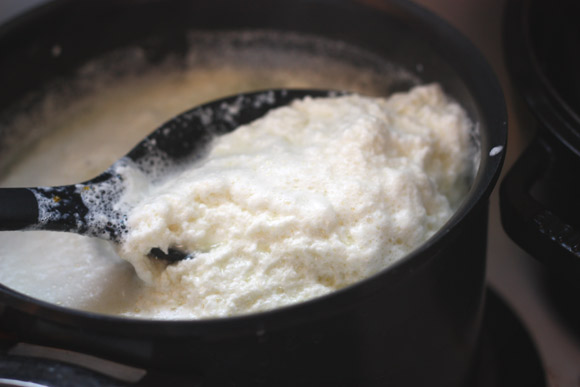
(In the photo above, the creamy ricotta curds form after adding acid — in this case, lemon juice — to the hot milks.)

Ricotta sitting in the drainer for a leisurely drip. All told, the ricotta took about 15 minutes behind the stove, followed by a one-hour rest in the sieve. While it drained, I ran to the grocery store to buy the ingredients for the evening’s dinner (the pizza rustica from yesterday’s post). By the time I returned, lusciousness had formed.
Control the texture by altering the drain time. For a smooth, super-creamy, spreadable ricotta, stop short of an hour, about 45 minutes. For use in recipes, such as lasagna or pizza rustica, let drain for an hour and a half (or even overnight). You’ll want a drier curd in those recipes, one that doesn’t exude water during baking.

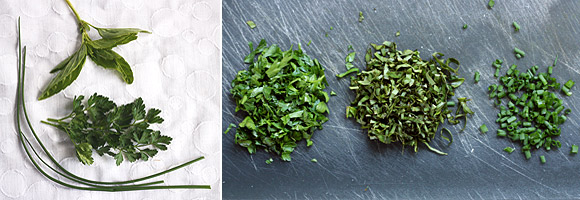
The ricotta is absolutely delicious on its own, but fresh herbs add a nice twist. Parsley and chives overwintered in my garden, so they were natural choice for me. I purchased basil — my seedlings are still too small to pluck — to go with the Italian pizza rustica.

I’ve tried numerous variations of the recipe for homemade ricotta, but this one is my favorite: the secret is the buttermilk.
It’s amazing that something so disgusting to drink can make everything — from bread to cake to salad dressings — taste somehow fresher, lighter and richer, all at the same time.
Karen xo

Homemade Herb Ricotta
Ingredients
- 8 cups whole milk 2 quarts or 1/2 gallon US
- 1 cup heavy cream
- 1/2 cup cultured buttermilk
- 3 tablespoons freshly squeezed lemon juice
- 1/2 teaspoon salt
- 2 tablespoons total of your favorites herbs minced (I used flat leaf parsley, basil and chives)
Special Equipment:
- cheesecloth
- thermometer instant read is handiest
Instructions
- Line a large sieve or colander with a double layer of fine-mesh cheesecloth and place it over a large bowl.
- Slowly bring the milks, cream and salt to a low boil in a large (4 qt or more) heavy pot over medium heat, stirring occasionally but shallowly, to prevent scorching (try not to scrape the bottom of the pot while stirring once the heat gets going. Scorching happens, and you don't want brown bits floating around in your ricotta). When the mixture reaches 190°F, remove from the heat and add the lemon juice. Stir gently until the mixture curdles (i.e., when the curds separate from the liquids in big, floating icebergs), about 2 minutes.
- Spoon the solid curds into the lined sieve and let drain for an hour (or an hour and a half for a drier curd). Move the ricotta to a bowl and give it a good stir. If the curds are too crumbly (i.e., too dry), add a bit of the drained liquid, stirring well to incorporate until you reach the desired consistency. Add the herbs and work them in with a spoon to combine. Cover and chill in the fridge. Discard the liquids or use for another purpose, such as bread-making (the liquid by-product of this process is whey, and whey is a wonderful substitute for the liquids in a yeast bread recipe). The ricotta will keep in the refrigerator for 2 to 3 days.

ALISON
Monday 4th of June 2012
This looks delicious, I am a sucker for fresh ricotta, Greek oliver oil and a crusty baguette!
Noelia
Saturday 14th of April 2012
We dont have buttermilk here should i use plain yogurt?
SoupAddict
Monday 16th of April 2012
I think I would just substitute more milk (or leave just it out completely and use a bit less lemon juice). On the other hand, it wouldn't hurt to experiment with the yogurt - it might be completely wonderful!
Food For Vitality
Wednesday 11th of April 2012
Absolutely stunning photos, and this ricotta looks amazing. I've never tried to make my own cheese, but this look like it's worth the effort. Making it this weekend!
Diane (DeAnna) Johnson
Tuesday 10th of April 2012
Your ricotta looks so luscious. I use lemon juice also when making homemade ricotta. After looking at your ricotta I am inspired to make it again soon. Your photography is beautiful!
Bryn
Tuesday 10th of April 2012
You've totally inspired me to give homemade ricotta another go. I made a batch last summer, and my result wasn't fantastic. It wasn't super-flavorful and came out a bit rubbery (methinks I drained it TOO much). I'm going to try your recipe and technique ... and soon!