Of all the many things I grow in my vegetable gardens, I have to say, alliums win the title for all-around awesomeness. They are so easy to grow, and the reward for cooks is huge. Most are great storers, and last 6-9 months. Some, like chives and leeks, can be grown nearly year round (chives do this by themselves; leeks, with a little planning and staggered planting, can be available 10 months out of the year).
The reluctant gardener might mark tomatoes and zucchini as traditional must-haves for the garden, but hesitate to make the commitment because of the care and maintenance they require. I get that.
So, for those folks, I always recommend something from the onion family as the garden starter vegetable. In most temperate areas of the U.S., now’s the time to plant garlic and shallots. Their bulbs will produce slow growth over the winter, concentrating on root development, and by the time spring hits, they’ll be ready to shoot right out of the ground.
And in the meantime, you do nothing but sit back and relax, snuggled warmly in your house with a hot bowl of soup.
Earlier this summer, I posted about my garlic and shallot harvests. Now I can show you how they came to be!
I set my garlic and shallots a couple of weeks ago. Here’s a peek at my garden and a how-to.
For both garlic and shallots, select a location that gets at least 6 hours of full spring and early summer sun. You don’t need a huge, dedicated bed: I’ve grown garlic around the perimeter of my deck in a single line. Turn the bed over to a depth of 6″, and work in compost or high-quality organic garden soil. Smooth the bed over before digging holes for the bulbs. If possible, let the area rest and settle for a couple days.

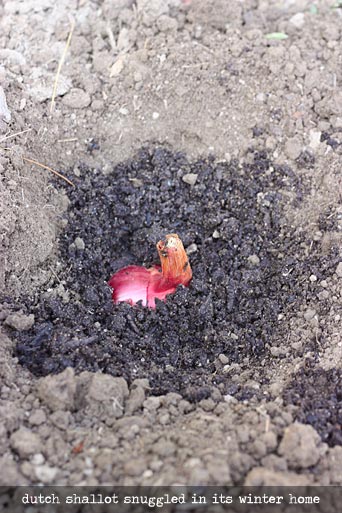
Shallots are amazing little things. One clove planted in the fall produces 3 to 5 fully mature shallots in early summer, in one connected cluster of plants. Shallot bulbs are wrapped very tightly in thick, protective skin and often contain 2 or 3 cloves. Unlike garlic, I don’t bother separating cloves, in favor of keeping the skin intact (garlic cloves are individually sheathed in sturdy skin — shallot cloves sometimes are not). The result will be a plant cluster of 6-10 shallots!
I’m planting two varieties of shallots this year: Dutch shallots, saved from this year’s harvest, and French, which I purchased new this year.
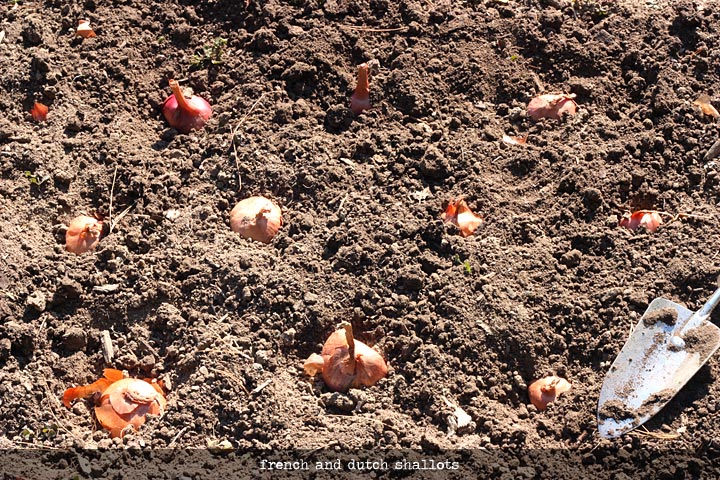
As seen in the photo at the very top, I pre-position the shallot bulbs in their bed so I can easily judge spacing and layout before digging the holes (and also mark Dutch from French, in case I forget. And by marking, I actually mean that I draw a diagram in my garden journal, noting the location and type of each and every bulb. Physical markers, like stakes or popsicle sticks don’t last the winter, as this is a heavily deer-trafficked area — they’ll stamp them right into the ground).
Shallot bulbs should be buried so that the top of the stem is flush with the ground, and just barely covered over (remember: stem end up, root end down). Give these guys plenty of elbow room — about 12″ apart in all directions. Cover the entire bed with a light layer of leave mulch for the winter. Give the bed a good watering, and you’re good to go until spring. (October and November is usually somewhat wet, there’s rarely a need for extra watering.)
In warm stretches of January and February, the bulbs might produce green shoots — no need to worry about taking special precautions. Even if they die back due to later extreme winter conditions, they’ll return in the spring.
Purchasing shallots: shallots are currently available at several online retailers, including Territorial Seed Co. and Burpee. Be prepared for the sticker shock: a pound of shallots (about 10 bulbs) can cost up to $20. Two things to note: those 10 bulbs could produce 50 shallots next summer, and if you cure and save some of the bulbs, you can plant your own stock next October (and for years to come). Those shallots will more than pay for themselves over time.

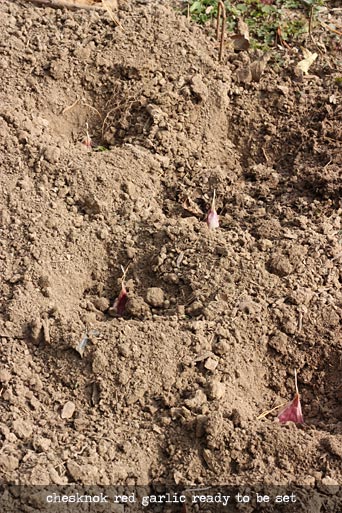
Garlic bulbs should be broken apart into individual cloves. Select only the largest, firmest cloves for planting, and use the others for cooking. Dig small holes a couple of inches deep, 8-10″ apart in all directions (if you’re planting large quantities of garlic, rows 2 feet apart will make for easier management. I grow about 50 plants in a concentrated, non-rowed area (photo below)). Dig all of the holes first so you can see the layout of the clove placement — it’s very easy to lose track of covered over clove holes!
Place the cloves in the hole pointy side up (the root end will be a small flat area at the base with no visible roots – that goes down into the dirt). You can see very clearly in the photo above, left, which end is the pointy one. Don’t peel the skins — they help protect the clove until it gets established. Cover over the cloves with at least 1″ of dirt. Water well, then spread a layer of mulch over the top for winter protection.
Like shallots, they might sprout green growth before winter’s end — again, not to worry. It will all shake out just fine in the spring.
Purchasing garlic: growing garlic has caught on very nicely in U.S., and avid growers like myself* pre-order our seed garlic in June or July. At this point in October, selection may be very limited, but some online nurseries, like Burpee, still have garlic stock. And honestly, any variety you grow at home will be far and away superior to grocery store garlic, which is not bred for flavor, but rather for toughness in surviving shipping and super long storage.
Another option: if you receive garlic bulbs in your CSA box, or if you have farmers’ markets nearby with garlic for purchase, you can absolutely plant that garlic in your garden. In fact, garlic grown in your locale will be better acclimated to your environment than garlic shipped from several states away.
Garlic is not quite as pricey as shallots, but even still, if you save part of next year’s harvest and cure it properly, you can plant cloves from those bulbs, saving money next year. (And making garlic even more economical, remember that one bulb can contain 6, 8, 12, 15 cloves, depending on the variety. One clove today = one whole garlic bulb next summer.
(*I did not purchase any new garlic this year as I’m planting the same strains as last year, using cloves from this summer’s harvest. My oldest saved-and-replanted variety, Georgian Crystal, is now in its 5th year, and as beautiful as ever.
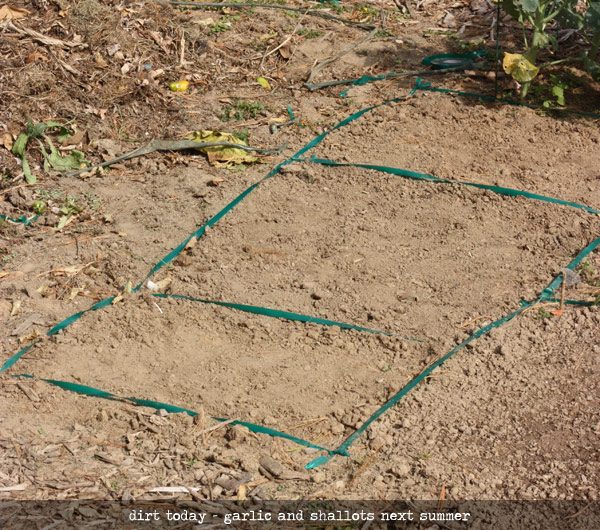
Because other veggies will go in this bed in late spring, I mark off the area so I don’t accidentally dig up the cloves (and, since I’m growing three varieties, they’re separated and marked as well (via another diagram in my garden journal), since I can’t tell one variety from another, even as they grow).
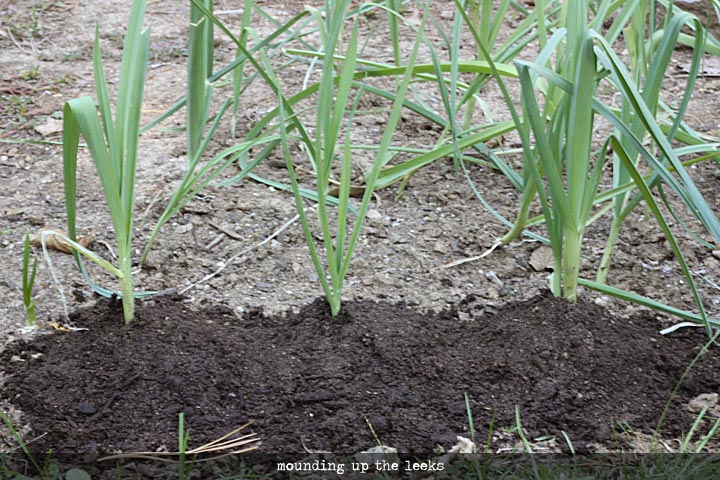
Another favorite from the allium genus, leeks, grow in my garden summer to spring. I started them indoors from seed in early February, and plant them outside when they’re about as tall and thick as a pencil. Young leeks can be harvested at any time in the summer. Leave plenty, however, to mature. They’ll grow happily all winter long, even in the snow, and can pulled as needed for cooking.
Above is one of two beds of maturing leeks. Leek plants need to have dirt mounded up around them to encourage growth of the edible elongated bulb (the dark green leaves — the flags — are not edible). Pile and firm dirt around the leek up to the point where the base of the leaves separate and fan out. This will prompt the leek to continue bulb growth.
(This, in case you ever wondered, is why leeks need to be thoroughly washed after slicing. Farmers aggressively mound their leeks to produce the best growth, and the dirt inevitably gets down into the base of the leaves and enters the rings of the bulb itself.)
No need to cover over the leek plants when the weather turns cold — they’ll survive (although you might need a hand shovel to free those babies from the frozen earth deep in January).
Leeks will continue slow growth into the spring, when they send up a flower stalk, at which point the leek loses quite a bit of flavor. If I don’t have early summer plans for the spot where the leeks are planted, I’ll let the stalks bloom. Meanwhile, the bulb will self-divide into several offshoots. I’ll harvest those offshoots and plant them elsewhere — they will rapidly regrow to mature leek stalks. (You can see those mature leeks in this post in the photo title “leeks…”.)
Karen xo

Rocky Mountain Woman
Friday 26th of October 2012
My friend and I just set out next year's garlic!
We are supposed to get snow in the valley next weekend, so we are getting it in just under the gun...
Christine
Thursday 25th of October 2012
My gardening life is lived vicariously through you. The current rental I live in has a 1-2' x 4' patch of dirt that I can plant in. 2 gardenia bushes (not my idea, landlady's) and my crazy volunteer tomato plant occupy the space. The "grass" has an impenetrable thatch layer that precludes digging it up, so as I said, I'm a garden voyeur and really enjoy your garden posts as much as the recipe posts. Have fun in the garden!
Cher
Thursday 25th of October 2012
Your garden descriptions almost make me believe that a brown thumb like mine could grow garlic :-) Congrats on your continued success in publishing - Huff Post, now this. Woot!