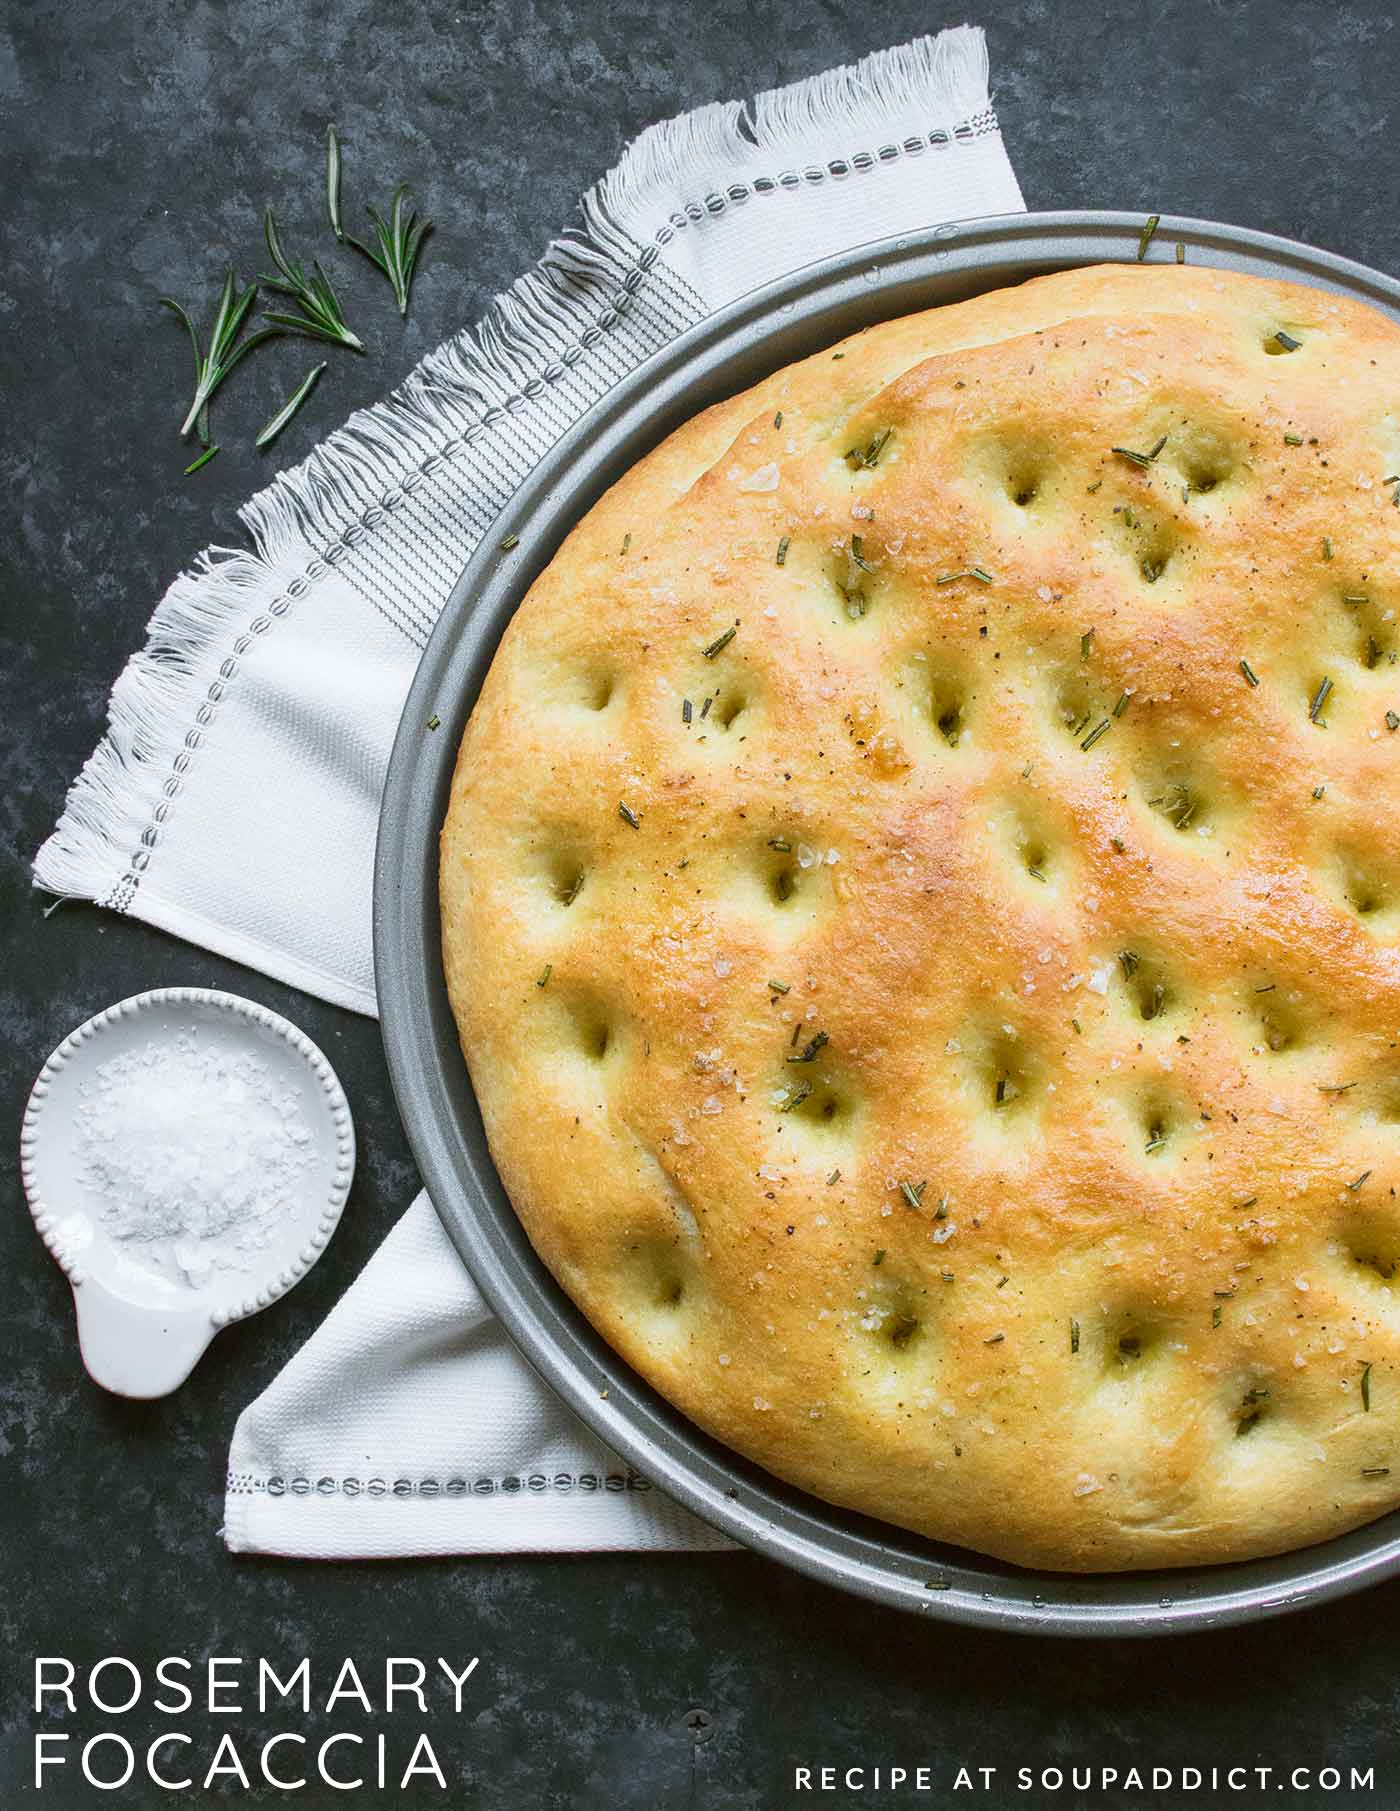
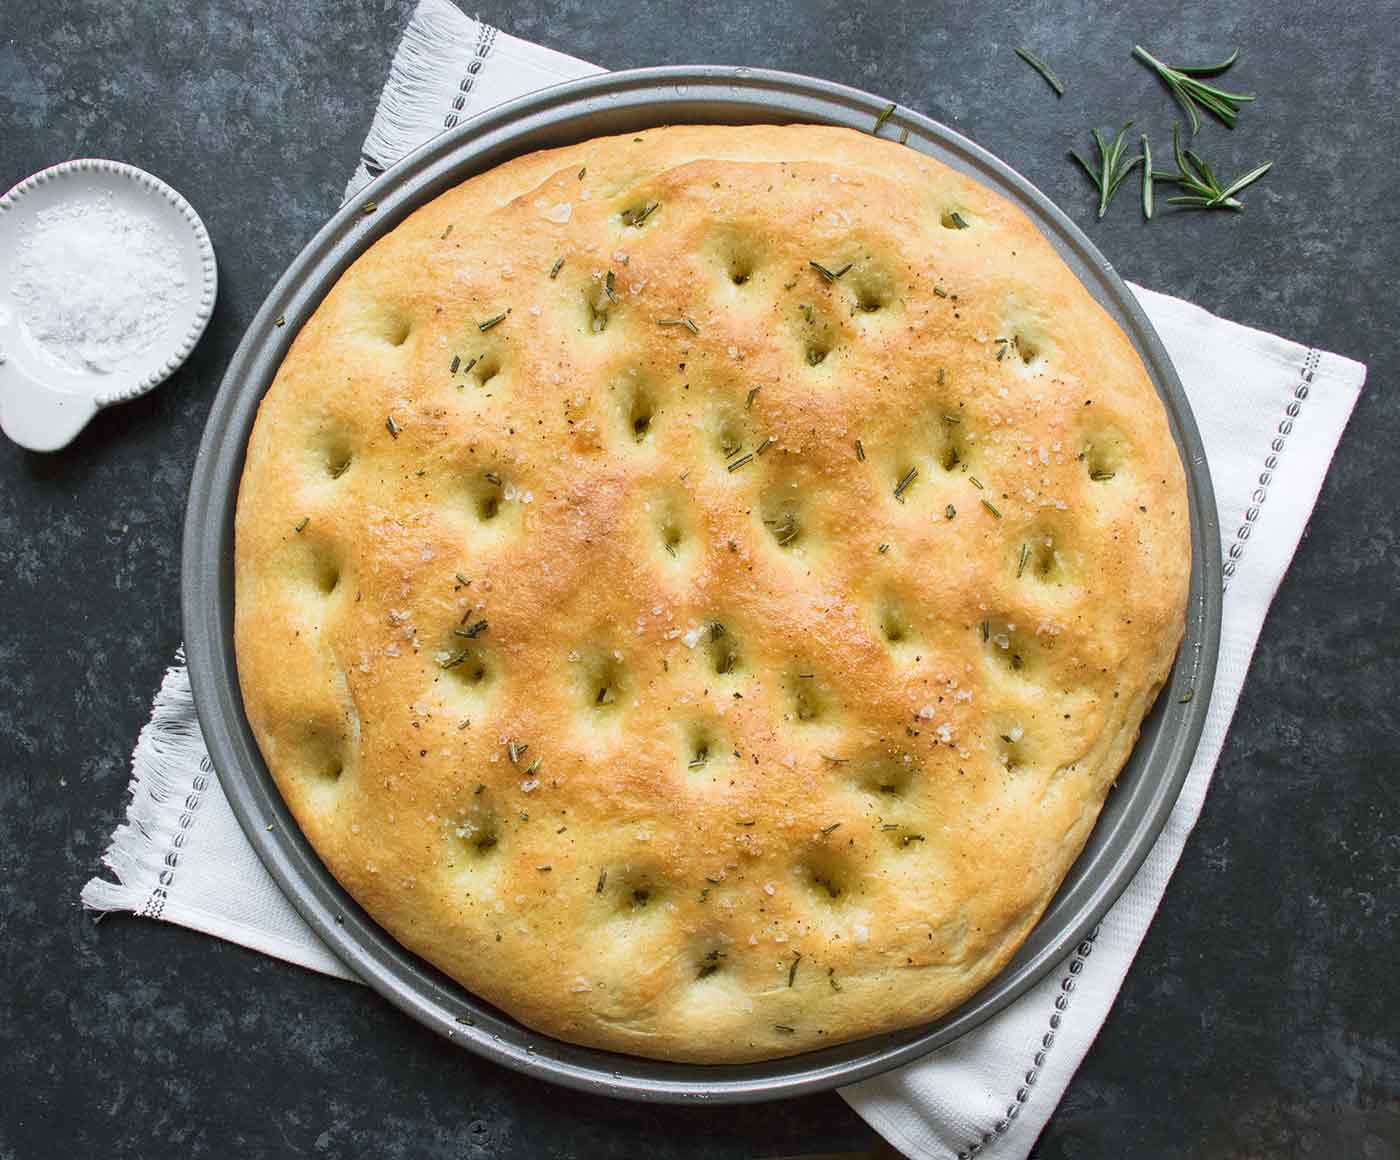
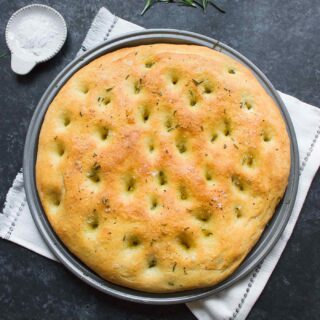
This classic Italian bread is a real flavor winner! Wonderfully salty and olive oil-y, rosemary focaccia is a lovely yeast bread project that’s perfect for the beginner and bread-baking veteran alike. The easy, optional starter adds depth of flavor, but with or without, the bread’s beautiful texture combination of chewy and pillowy is irresistible!
There’s something special about focaccia bread that’s completely irresistible to me. It’s the extra virgin olive oil, I think.
The high oil content adds flavor and also crisps the bread’s outside edges. Not French baguette crackly, but a texture that snaps a bit when you bite into it, with tender insides. Just lovely.
My recipe includes an optional starter – which, if you use, you’ll need to begin the day before the bake – as well as a quick brining; an idea I got from the wonderful Samin Nosrat. Another unique flavor feature of focaccia is its saltiness, and brining the dough with a saltwater wash (don’t worry, it’s super easy), adds a uniform layer of salty goodness.
How to Make a Bread Starter
The easiest of easy yeast bread projects! No matter the volume, making a sourdough starter is as simple as stirring together flour, water, and yeast in a bowl until incorporated, and then letting the dough rest, covered at room temperature, for a number of hours.
The purpose of a starter is to both develop flavor during the fermenting rest, and to give the yeast a nice head-start in growth before you finish the rest of the dough. Look at how this simple, three-ingredient starter expands during its 16-hour rest:

If you’re new to bread starters, I encourage you to take a sniff of the risen starter dough. Notice how it’s very fragrant: yeasty and even a little bit boozy. That’s because yeast gives off sugars and alcohols during its rise.
How to Make Focaccia Dough
The dough for rosemary focaccia is wonderfully easy to make, in terms of yeasted bread doughs. It’s especially easy if you use instant yeast (learn all about the types of yeast used in baking), which doesn’t require proofing.

Mix the dough ingredients together, either by hand in a large bowl, or in a stand mixer. Kneed the dough for about 5 minutes and form into a smooth ball.
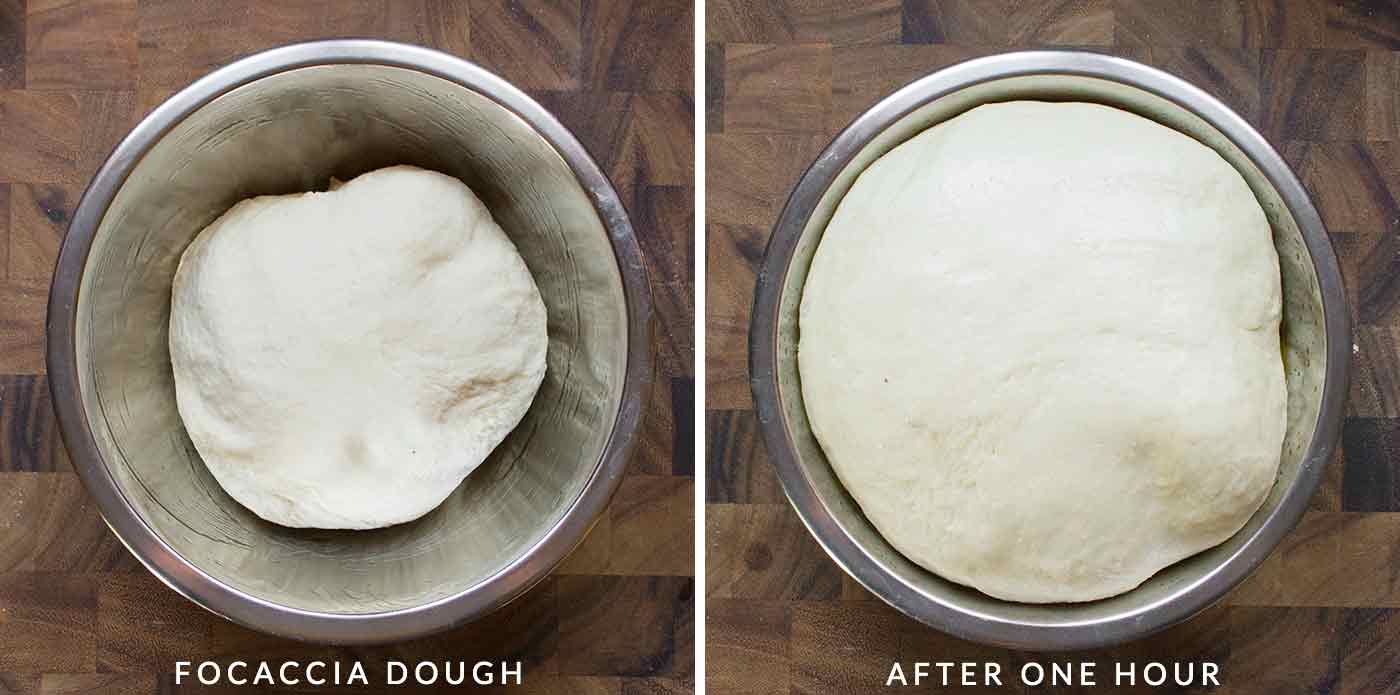
Now, leave the dough to rise for an hour, letting the hungry yeast do all the work of creating flavor and puff.
Prepare the Dough for Baking

The risen dough will be loose and pliable, and ready to press into a well-olive-oiled pan. I like to use a 12″ pizza, because it’s the perfect size, but you can use just about any shape, or even free-form on a baking sheet.
If, when spreading and shaping the dough, it gets tight and snaps back from where you’re trying to push it, just let everything rest for 10 minutes, and try again. That’s the gluten begin stubborn. Let the dough rise again.
Brush the now puffy dough with the brine, and then start the dimpling (my favorite part). You can use your fingertips, or, if have long fingernails, use your knuckles. The dimples will catch and absorb all the yummy extra virgin oil that you’re about to pour on.
If you have rosemary-infused olive oil, a light brushing of it is lovely. I have a homemade version that I often use on this rosemary focaccia bread.
Finish off with a nice sprinkle of flaky salt, like Maldon. If you don’t have flaky salt, use a coarse kosher salt. Table salt and fine sea salt are a bit too salty-intense for this bread. The goal is to get gentle hits of salt in each bite, which is why flaky salt is so perfect here.
A Tip for Easy Clean-up
The dough in this recipe is slightly sticky, and that means that your bowls and tools will be covered with spots of wet sticky dough by the time you’re done.
And since trying to scrape sticky dough out of the bowl is an exercise in futility, the temptation is let the bowl soak in water to loosen everything up, right?
As someone with old pipes in their house, I’d like to send out this heads-up: flour and water is basically paste, so, it’s really a better idea all around to not send bits of paste down the kitchen drain. No matter how young your pipes are.
Instead, sprinkle a nice big pinch or two of flour into the bowl, and use your fingers to rub the flour into the sticky bits. They’ll begin to pull away in a crumbly mass that can be dumped into the garbage.
This same trick can be used on your hands. This focaccia dough isn’t that sticky, but for other bread projects that coat your hands in stubborn wet dough, grab up a palmful of fresh flour and rub your hands together over the garbage can or a large bowl. Easy peasy!

What to Serve with Rosemary Focaccia
Focaccia is a versatile loaf that goes with just about any meal. It goes without saying that I love warm slices of focaccia alongside a comforting bowl of soup, both for nibbling and dipping! But there are lots of ways to enjoy this beautiful bread. Here a few ideas:
- Sandwiches: Focaccia’s chewy texture makes it a great candidate for sturdy sandwich fillings, such as meats, cheeses, and tuna and chicken salads.
- Breakfast: I adore slices of this bread for breakfast. Because of its generous extra virgin olive oil content, it doesn’t even need buttering or marmalading. Just a quick toasting, and it’s the perfect accompaniment to your morning orange juice, tea, or coffee.
- Charcuterie Board: I discovered this pairing accidentally. I had planned a dinner of tomato soup and homemade focaccia one Saturday night during the quarantine. But then my local butcher shop announced on Facebook that they had made a batch of charcuterie boards for two, ready for pick-up. Well, I couldn’t get my shoes and face mask on fast enough!
I cobbled together some vegetables and veggie dip, and, goodness, what a lovely dinner! But, then I’m always the sucker for the appetizers-as-a-meal situation. Look how tempting:

How to Store Rosemary Focaccia
Freshly baked focaccia is best served the same day, as the slightly crispy salty texture will stay perfect within hours of baking. However, you can preserve leftovers for the next day by wrapping the extras in parchment paper, or overwrapping the bread in plastic wrap. Then wrap again in foil.
Refresh rosemary focaccia slices by toasting them, or placing them under the broiler on a broiler-safe pan for a few minutes to renew the chewy texture.

Rosemary Focaccia
Ingredients
For the the starter* (optional, see notes):
- 1 big pinch instant yeast**
- 1 cup all-purpose flour
- 1/2 cup room temperature water
For the dough:
- 2 cups all-purpose flour
- 1/2 cup very warm water (110°)
- 3 tablespoons extra virgin olive oil
- 2 1/4 teaspoons instant yeast
- 1 1/2 teaspoons flaky salt (or coarse kosher salt)
- 1 teaspoon sugar
For the brine:
- 1 teaspoon kosher salt
- 1/3 cup warm water
For finishing:
- extra virgin olive oil or rosemary olive oil (link) optional
- flaky salt
- 1 sprig rosemary , leaves removed and chopped (discard stem)
Instructions
Prepare the optional starter:
- If not using the starter, proceed to next section for the dough, and ignore any reference to the starter.
- Add the three ingredients together to a small-medium bowl. Stir with a spoon until combined (no spots of dry flour).
- Cover and let sit on the counter at room temperature for 12 to 16 hours. If you need more time than that – say, overnight – you can refrigerate it for a portion of the time; bring to room temperature again before use.
- The starter is ready to use when it’s expanded and bubbly, with a lovely yeasty scent.
Prepare the dough:
- Add all of the dough ingredients, plus all of the starter (if using; if not, make sure you read the notes below), to a large mixing bowl (if proceeding by hand) or the bowl of a stand mixer. Mix until combined and then knead for 5 minutes (use the dough hook of the stand mixer).
- Form the dough into a smooth ball, place in a lightly oiled bowl and cover. Let rise at room temperature for an hour. It will have about doubled in size.
- Spread a tablespoon or so of olive oil over the surface of a 12″ pizza pan. Use your fingers or a paper towel to coat it completely. (Note that a paper towel will absorb some of the oil, so be prepared to use more.)
- Scrape the dough from the bowl onto the pan. Use the pads of your fingers to push the dough out towards the edges of the pan, leaving a 1/2" margin all the way around (to leave room for the dough to rise and expand). You'll want the dough to be just under 1" thick.
- Cover the pan and allow the dough to rest for 30 to 60 minutes until puffy – the dough will likely have expanded all the way out to the edge of pan.
- Preheat the oven to 425° and place a rack in the lower third of the oven.
For the brine:
- While the dough rises, stir together the salt and warm water until the salt is completely dissolved.
- When the dough finishes its rise, uncover, and brush the top of the dough with the brine. You don’t need to saturate the dough, but it should be shiny with the water.
For the bake:
- Using your fingertips or the central knuckle of your forefinger (if you have long fingernails), press deep dimples into the dough in an irregular pattern.
- Drizzle extra virgin olive oil — or a combo of evoo and rosemary-infused evoo — over the dough, letting the oil pool in the dimples.
- Sprinkle flaky salt and chopped rosemary leaves over the dough.
- Bake for 25 to 30 minutes, or until the top is golden.
- Remove to a cooling rack, and let cool until touchable. Slice and serve!
Notes
Nutrition